
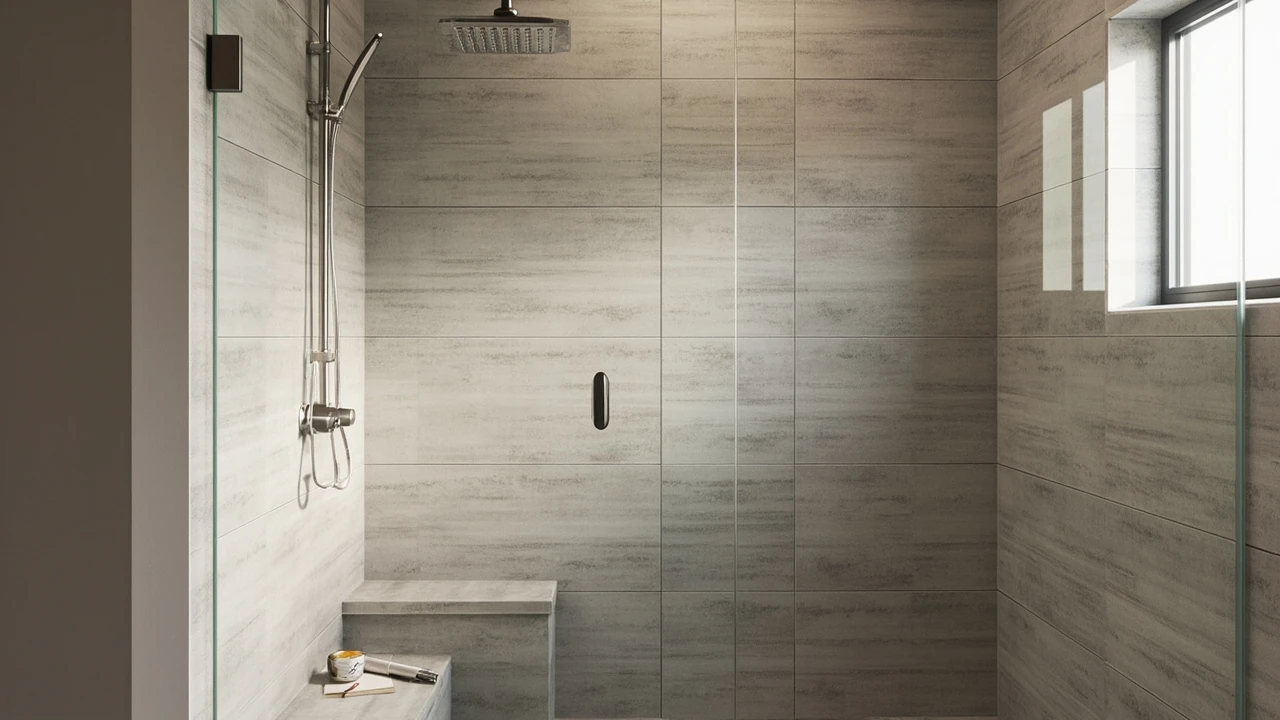
Shower remodeling: a practical guide to planning, costs, and choices
A standing-seam leak at the base of an old fiberglass surround, a cramped 36-inch alcove that the door handle keeps catching on, tile grout that has gone black and will not come clean; these are the everyday reasons homeowners start a shower remodeling project. Most are not chasing a magazine look. They are solving a moisture problem, a safety concern, or a layout that no longer matches how the household actually uses the bathroom. The decisions that follow, scope, layout, waterproofing, tile, fixtures, and budget, are easier to make once that real problem is named.
This guide walks through the choices a typical homeowner faces during shower remodeling, with attention to the order in which those choices matter. A few decisions, such as drain location and waterproofing method, must be locked in before tile is even selected. Others, like the finish on the showerhead, can be changed later without redoing the whole project. Treating the work as a sequence, rather than a shopping list, is the single most useful thing a homeowner can do at the start.
Start with the real problem you are solving
Before browsing tile or fixtures, walk into the existing shower and write down what actually frustrates you. A clear list of frustrations, separated from nice-to-haves, is more useful than a mood board because it constrains later choices. Common starting points include:
- Water on the bathroom floor after every shower, suggesting failed waterproofing or a curb that is too low.
- Mold or mildew that returns within days of cleaning, usually a grout, caulk, or ventilation issue.
- A door or curtain that keeps getting hit, meaning the alcove is too narrow for the current door swing.
- A valve that drifts in temperature when another fixture runs, pointing to a missing pressure-balancing or thermostatic valve.
- An aging family member who now needs grab bars or a seat, which forces structural blocking inside the wall.
Once the list is written, group the items. Anything involving water management, structural backing, or valve replacement belongs in the must-have column. Anything involving color, finish, or decorative tile belongs in the nice-to-have column. That split matters because must-have work usually requires opening the wall and floor, while nice-to-have work can be added later as budget allows.
Choose a layout that fits the existing plumbing
Layout is the first decision to lock in because it drives demolition, plumbing rough-in, and waterproofing. The three most common layouts in shower remodeling are:
| Layout | Best suited to | Plumbing impact | Main trade-off |
|---|---|---|---|
| Alcove (three-wall) shower | Tight bathrooms, tub-to-shower conversions | Reuse existing drain if the footprint matches; valve usually moved slightly to center on the new wall | Limited width at the entrance because two side walls take up space |
| Corner (neo-angle or square) shower | Bathrooms with an open corner and a door centered on a diagonal | Drain often needs to move; curb line changes | Glass panels cost more than a single flat door and are harder to keep clean |
| Walk-in with one glass panel | Larger bathrooms, aging-in-place projects, curbless designs | Drain may need to relocate to the shower footprint; linear drain is common | Requires precise floor slope and full waterproofing; not forgiving of installation errors |
Keeping the drain in its existing location is one of the easiest ways to control cost during shower remodeling. Moving a drain in a concrete slab is expensive because the slab has to be cut and patched. Moving a drain in a wood-framed floor is cheaper, but still involves opening the subfloor and possibly modifying joists. Homeowners who want a curbless walk-in but have a slab foundation should ask the contractor early whether the existing drain can be reused with a linear drain channel.
Decide on the waterproofing method before selecting tile
Tile and grout are not waterproof. They are decorative, durable, and water-resistant, but the waterproof layer sits behind them. The three waterproofing systems most often specified in residential shower remodeling are:
| System | How it works | Typical use | Notes for homeowners |
|---|---|---|---|
| PVC or CPE sheet membrane (e.g., traditional pan liner) | A flexible sheet is installed behind the wall substrate and sloped under a preformed or mud bed | Long-established method, common with custom mud beds | Requires a pre-slope under the liner and a clamping ring drain; not a DIY-friendly system |
| Foam shower panels (e.g., XPS or EPS panels with a bonded membrane) | Lightweight foam panels replace cement board; seams and fasteners are sealed with a supplied kit | Faster install than sheet membranes, common in remodels with a tight schedule | Panels are easy to cut, but the manufacturer-specific sealant must be used or the warranty is void |
| Liquid-applied membrane (roll-on waterproofing) | A paint-on coating is applied over cement board in multiple coats to a specified mil thickness | Common for tile-ready foam boards and renovation projects | Coverage is critical; the manufacturer’s required thickness and dry time must be followed |
None of these systems is universally better. What matters is that the system is installed as a complete system, meaning the drain, corners, and seams all use the same manufacturer’s tested components. Mixing a sheet liner drain with a liquid-applied wall membrane, for example, is a common shortcut that often leads to failures. During shower remodeling, asking the installer which system they are certified to install, and which drain integrates with that system, is a fair and useful question.
Pick tile that suits the size of the shower and the cleaning tolerance of the household
Tile choice in shower remodeling is partly aesthetic and partly maintenance. Larger tiles mean fewer grout lines, which means less scrubbing and a cleaner visual, but they also require flatter substrates and more careful planning around niches and corners. Smaller tiles, including mosaics, are more forgiving of uneven walls and slopes, but produce more grout that has to be sealed and maintained.
Material choice is more straightforward than it looks. Porcelain is the default for most showers because it absorbs very little water, holds up to daily use, and comes in formats from 2-inch mosaics to 24-inch wall panels. Ceramic is similar but slightly more porous, and is usually chosen for wall-only applications. Natural stone, including marble, travertine, and slate, looks distinctive but usually needs sealing on installation and resealing on a schedule. A household that does not want to keep up with sealing will be happier with porcelain that mimics stone than with the real thing.
For slip resistance, a tile rated for floor use matters more than a tile’s appearance. Smooth, glossy tile that looks great on a sample board becomes a slip hazard when wet. A practical compromise is to use large-format porcelain on the walls and a smaller, more textured tile, or a mosaic with many grout joints, on the floor.
Plan niches, benches, and blocking before the walls close up
Once the waterproofing system is chosen, the wall framing is the last chance to add features that are awkward to retrofit later. Built-in niches, benches, grab bar blocking, and even a future handheld outlet all become much cheaper when the framing is open. Homeowners planning shower remodeling often forget this window because the work is hidden behind tile once the project is done.
A useful pre-close-up checklist for the homeowner includes:
- Confirm the niche location, height, and depth, with at least one niche large enough for tall bottles.
- Confirm bench height, usually 17 to 19 inches off the shower floor for a comfortable seat.
- Confirm blocking for future grab bars, even if no bars are being installed now.
- Confirm the height of the showerhead outlet and the handheld outlet, and whether a slide bar is planned.
- Confirm placement of any LED niche lighting, including routing for a low-voltage driver outside the wet zone.
This is also the moment to decide whether the shower will use a single showerhead, a showerhead with a handheld, or a more involved system with body sprays. Body sprays require additional plumbing and a larger valve, and most homes do not have the water pressure or supply capacity to run three or more sprays at once. A plumber can test the static and dynamic pressure before the walls close and tell the homeowner what is realistic.
Select fixtures that match the valve type and water pressure
Fixtures in shower remodeling are usually the last decision, but they are constrained by everything that came before. The valve behind the wall determines how many outlets can run at once, whether temperature is pressure-balanced or thermostatic, and which trim kits fit. A homeowner who wants a rainfall head plus a handheld plus a body spray needs a valve body with enough ports and enough flow capacity to support that combination.
Finishes are easier to coordinate now than they were a decade ago. Most major lines offer the same finish across showerheads, handhelds, trim, and accessories, so a brushed nickel showerhead, handheld, and grab bar can be ordered from the same series. Finishes do not have to match across brands, but mixing too many lines can make replacement parts harder to find in five or ten years.
Water pressure and flow deserve a brief technical note. Standard showerheads in many homes are now rated at 1.75 to 2.0 gallons per minute, which is plenty for a comfortable shower with good pressure. Larger rainfall heads, especially 10 inches and up, can feel weak on the same supply line because the water is spread across a wider area. If the existing pressure is marginal, a smaller rainfall head or a head with a pressure-boosting insert is a better fit than a 12-inch model.
Set a budget that reflects the layers, not just the tile
Tile is the most visible part of a shower remodel and often the line item homeowners fixate on, but it is rarely the largest. A useful exercise is to break the project into layers and ask the contractor for a cost on each:
| Layer or scope | What it includes | Typical share of total cost |
|---|---|---|
| Demolition and disposal | Removing the existing surround, curb, and pan; hauling debris | 5 to 10 percent |
| Plumbing rough-in | Moving or adding supply lines, installing the new valve, drain work | 15 to 25 percent |
| Waterproofing and substrate | Wall and floor substrate, membrane system, pre-slope, curb | 10 to 20 percent |
| Tile labor and materials | Setting tile, grout, trims, niche detailing | 25 to 40 percent |
| Glass enclosure | Framed, semi-frameless, or frameless panels and door | 10 to 20 percent |
| Fixtures and accessories | Showerhead, handheld, trim, drain cover, grab bars, niche inserts | 5 to 15 percent |
Reading the table the other way, if the goal is to reduce cost without compromising waterproofing, glass and fixtures are the easiest places to scale down. A framed glass enclosure costs less than a frameless one. A single showerhead costs less than a multi-outlet system. A standard drain cover costs less than a tile-in linear drain. Tile labor, plumbing rough-in, and waterproofing are the layers where shortcuts tend to cause the most expensive callbacks, so it is usually wiser to spend there and save on visible finishes.
What to ask the contractor before signing a shower remodeling contract
The contract is the right place to capture all of the design decisions that were made on the fly during planning. Verbal agreements about niches, blocking, and tile pattern are easy to forget once demolition starts. A short, written scope attached to the contract keeps the project honest.
Useful items to have in writing include:
- The exact waterproofing system, by manufacturer and product name, and which drain integrates with it.
- The valve model and the corresponding trim kit, since these are sometimes ordered separately.
- The tile layout, including where pattern changes, where accent strips are placed, and how niches are detailed.
- Confirmation of blocking for future grab bars, even if bars are not installed now.
- The shower curb height and the floor slope direction, especially for curbless designs.
- Who is responsible for patching the drywall outside the shower area where it was opened for plumbing.
- Who handles the glass enclosure measurement and installation, and on what timeline relative to tile.
Two extra questions are worth asking because their answers often change the schedule. First, who measures the glass, the tile contractor after the walls are set, or the glass company on its own schedule? Second, what is the lead time on the valve, trim, and any specialty tile, and is anything backordered? A 6-week lead time on a valve body can delay the entire project if it is not identified at the contract stage.
Common mistakes that show up after the tile is already on the wall
Most shower remodeling problems are not dramatic leaks on day one. They are slow issues that appear within the first year. A few of the most common include:
- A curb that is too low, causing water to migrate onto the bathroom floor during heavy use.
- Grout that was never sealed, or that was sealed before it fully cured, leading to discoloration and mildew.
- A door sweep that was not adjusted, allowing water to escape under a frameless door.
- A niche without a slight downward slope on the sill, so water sits in the shelf and eventually migrates into the wall.
- A valve without service access, so a future cartridge replacement requires breaking tile.
None of these issues is exotic. They are the kind of details a careful installer handles as part of normal practice, and the kind of details a rushed installer skips. A homeowner who knows to ask about them during planning can get them written into the scope before they become warranty items.
How shower remodeling affects the rest of the bathroom
Shower work rarely lives alone. A remodel that opens the wall behind the valve will usually disturb drywall on the opposite side of that wall, which means repainting at least that section. A curbless walk-in usually requires the bathroom floor to be re-sloped or rebuilt, which means new floor tile across a larger area than the shower footprint. A new shower drain sometimes sits at a different elevation than the old one, which can require a transition at the bathroom doorway.
For a household trying to scope the project, the most honest framing is that the shower is the center of a small renovation, not a standalone swap. Planning for the surrounding surfaces, even if they are being patched rather than replaced, avoids the surprise of a finished shower next to torn-up drywall that no one budgeted for.
After the work is done: the first 30 days
Shower remodeling is not quite finished on the day the contractor leaves. Tile grout and certain sealants need time to cure before the shower is used heavily. Most manufacturers recommend waiting 24 to 72 hours after grouting before the first use, and longer before steam cleaning or aggressive scrubbing. The homeowner should also plan a walkthrough with the installer about a week after first use, to check for any issues with the curb, the door sweep, and the niches while they are still easy to fix.
A short settling-in checklist is worth keeping on the bathroom mirror for the first month:
- After the first three showers, check the bathroom floor outside the shower for water.
- After the first week, inspect grout lines and the curb-to-floor joint for any signs of moisture.
- After the first two weeks, run the shower for 10 minutes with the bathroom door closed and verify that the fan clears the mirror.
- After the first month, recheck the caulk joints at the curb and around the niche for any separation.
Catching a small issue in the first month is far cheaper than catching it in the first year, because the installer is still on the project mentally and a quick return visit is usually straightforward.
Frequently asked questions
How long does a typical shower remodeling project take?
For an alcove conversion with a tile base and a frameless glass enclosure, a realistic timeline is 2 to 4 weeks of active work, plus a wait of another 1 to 3 weeks for the glass to be measured and installed after tile is complete. Custom walk-in projects with body sprays, linear drains, and large-format tile often run longer because each trade has to wait for the previous one to finish.
Can the existing drain stay in place during a shower remodel?
Sometimes. If the new footprint lines up with the old drain location, especially in a wood-framed floor, the drain can usually be reused. In a concrete slab, reusing the drain usually means accepting the existing location, which may push the design toward an alcove rather than a walk-in.
What is the difference between a pressure-balancing and a thermostatic valve?
A pressure-balancing valve keeps total flow steady but lets temperature drift if pressure on the cold side changes, for example when a toilet is flushed. A thermostatic valve holds the set temperature more precisely, which is useful in homes where multiple fixtures are used at once. Thermostatic valves cost more and are slightly more complex to service.
Is a curbless walk-in shower a good idea for aging in place?
A curbless walk-in removes a tripping hazard and makes the shower usable with a walker or a wheelchair, but it requires careful floor slope and full waterproofing. In a slab foundation, the cost of building a proper slope can be significant. In a wood-framed floor, it is usually easier because the subfloor can be re-framed to create the slope.
How do I keep grout from getting moldy in a new shower?
Use an epoxy grout in high-use showers, or seal a cement-based grout on the schedule the manufacturer recommends, usually once a year. Squeegee the walls after each shower and run the bathroom fan for at least 20 minutes. Mold in a new shower is almost always a moisture problem, not a grout problem.
What is the most common hidden cost in shower remodeling?
Behind-the-wall plumbing changes and waterproofing system upgrades are the items that most often surprise homeowners, because they are not visible in the finished project. A valve relocation, a drain move, or a switch from a basic pan liner to a full bonded membrane system can add several hundred to a few thousand dollars to a project that was originally quoted against a like-for-like replacement.
Do I need a permit for shower remodeling?
Most jurisdictions require a permit when plumbing is moved or when waterproofing is part of a structural change, and many require a final inspection. A bathroom that is being updated cosmetically, with no plumbing changes, often does not need a permit. The local building department is the right place to confirm before work begins.
Should I choose a framed or frameless glass enclosure?
Framed enclosures cost less and tolerate small out-of-plumb walls better. Frameless enclosures look cleaner and show off tile work, but they require thicker glass, precise measurements, and a tile surface that is flat enough for the hardware to seal against. For bathroom remodeling projects where the tile work is the visual centerpiece, frameless is usually worth the added cost. For utility-focused projects, framed is a reasonable choice.
Can I reuse the existing shower valve to save money?
Sometimes, but a valve that is more than 15 to 20 years old is reaching the end of its practical service life, and replacing it during shower remodeling is cheaper than opening the wall twice. If the trim is being changed anyway, the valve body usually has to match the new trim, which often means a new valve.
What should I do if the contractor finds water damage behind the old shower?
Stop work, document the damage with photos, and ask for a written change order before any repair proceeds. Water damage behind a shower often involves subfloor replacement, sometimes partial framing replacement, and is a normal finding in older bathrooms. The right response is a clear scope and a clear price, not a verbal agreement.
Leave a Reply