
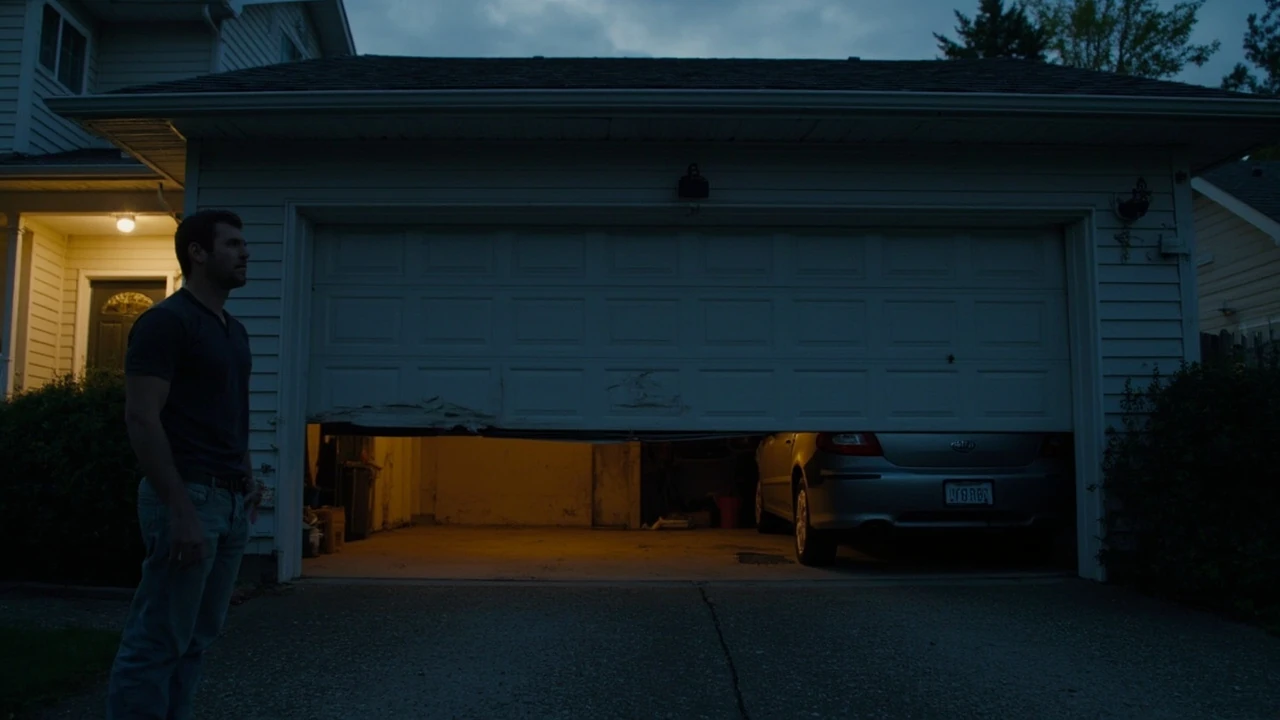
Broken garage door: causes, fixes, and when to call a pro
A broken garage door rarely fails on a calm afternoon. It usually gives out on a school morning when you are already late, in the middle of a thunderstorm, or the night you come home with a trunk full of groceries. Because the door is the largest moving part of a typical home and is held under high spring tension, even a small symptom can turn into a stuck, noisy, or unsafe door very quickly. Knowing the difference between something you can safely troubleshoot and something that needs a trained technician is the most useful skill a homeowner can have for this part of the house.
This guide walks through the most common reasons a garage door stops working, what a homeowner can reasonably inspect without special tools, and the warning signs that mean it is time to stop and call a service company. The focus is on standard residential sectional doors, which are by far the most common type in North American homes and are the design covered on the English Wikipedia overview of garage doors, which provides useful background for this point.
How a residential garage door is supposed to work
Before troubleshooting a broken garage door, it helps to understand what the system is actually doing. A modern sectional door is not lifted by the opener’s motor alone. The motor is designed to move a door that has already been counterbalanced by a spring system, and the springs do most of the heavy lifting in terms of weight. According to the Wikipedia entry on garage doors, a typical door can weigh 400 lb (180 kg) or more and is balanced by either a torsion spring mounted above the opening or a pair of extension springs mounted along the horizontal tracks.
When everything is working, the door should:
- Feel light to the touch when you disconnect the opener and lift it manually halfway, then stay in place rather than drifting up or slamming down.
- Travel smoothly along the tracks with no jerking, binding, or scraping noises.
- Reverse within a couple of seconds when something blocks the photo-eye sensors while the door is closing.
- Sit flush against the floor and the weatherstripping when fully closed, with no visible daylight gaps.
Any meaningful change in those behaviors is a clue. A door that suddenly feels heavy, that drifts, that scrapes, or that refuses to reverse is not just inconvenient. It is a sign that one of the system’s parts is failing, and the next failure may be the spring, a cable, or a panel rather than something cosmetic.
Quick safety note before you do anything else
Garage doors are involved in thousands of emergency room visits each year in the United States, and a large share of those injuries come from homeowners trying to fix a spring or cable. The U.S. Consumer Product Safety Commission has published repeated guidance warning that garage door springs, cables, brackets, and the bottom fixtures are under extreme tension and should be repaired only by trained service technicians.
Two practical rules follow from that guidance:
- Do not try to adjust, loosen, or remove a torsion spring or an extension spring, even if a how-to video makes it look simple.
- Do not stand, walk, or let children stand beneath a door that is moving unevenly, jerking, or hanging at an angle. A cable snap or panel failure can drop the door in a fraction of a second.
Everything in the troubleshooting sections below assumes the door is in a stable, stationary position. If the door is stuck partway up, the safest move is usually to pull the red emergency release cord (after the door is fully closed, if possible), leave it in the down position, and arrange a service visit rather than forcing it.
Common symptoms and what they usually mean
Homeowners tend to describe a broken garage door in general terms: “it won’t open,” “it won’t close,” “it makes a terrible noise,” or “the remote stopped working.” Each of those descriptions usually points to a smaller set of likely causes. The table below maps the most common symptoms to the parts that most often cause them, and flags whether the problem is typically a homeowner fix or a technician job.
| Symptom | Most likely cause | Typical fix | Homeowner or technician |
|---|---|---|---|
| Wall button works, remote does not | Dead remote battery, remote needs reprogramming, antenna damage, radio interference | Replace battery, reprogram remote per opener manual | Homeowner |
| Opener hums but door does not move | Worn drive gear, stripped trolley, disengaged carriage, broken belt or chain | Re-engage carriage, replace gear/sprocket assembly, replace belt or chain | Technician for most cases |
| Door opens partway and reverses | Misaligned or dirty photo-eye sensors, close-force limit set too low | Clean lenses, realign sensors until both LEDs are solid | Homeowner |
| Door is very heavy when lifted by hand | Broken torsion spring or broken extension spring | Replace spring and inspect cables | Technician only |
| Door moves unevenly or one side lags | Snapped or fraying cable, worn roller, bent track | Replace cable, replace rollers, straighten or replace track | Technician only |
| Door closes hard and bounces back up | Misaligned sensors, damaged bottom seal, obstruction, bad close-force setting | Clear obstruction, clean sensors, replace weatherstrip, adjust close force per manual | Homeowner for sensors and seal; technician for force recalibration |
| Loud bang followed by door stuck at angle | Spring break, cable snap, or top fixture failure | Do not operate. Secure the area and call service. | Technician only |
| Door will not fully close, leaves a gap | Limit switch set wrong, sensor obstruction, uneven floor, bent track | Adjust close limit on opener, clear obstructions, relevel track | Homeowner for limits; technician for track and structural issues |
That table is a starting point, not a diagnosis. The next sections explain each cluster in more detail so you can decide what you are comfortable handling and what should go straight to a service call.
Remote and keypad problems: the easiest fixes
If a single remote control has stopped working, the answer is almost always one of three things: the battery, the programming, or interference. Replace the battery first, even if the old one is relatively new, because voltage under load is the real test. If a new battery does not restore function, locate the “learn” button on the back or side of the opener motor head, press it, and reprogram the remote according to the manual. Most openers also have an LED near the learn button that will flash to confirm a successful pairing.
Common causes of remote and keypad trouble include:
- A neighbor’s opener on the same frequency, particularly in older openers that use dip-switch codes rather than rolling codes.
- LED light bulbs in the opener head, which can flood the radio receiver and stop it from hearing the remote signal.
- A damaged antenna wire hanging down from the motor head, or a motor head installed on a metal surface that blocks the signal.
- Keypad key fade from sun exposure, which can make the numbers hard to see even when the electronics still work.
If the wall-mounted push button inside the garage does not work either, the problem is more likely in the low-voltage wiring between the button and the opener head, or in the opener’s logic board. Check the wire staples to make sure no staple has pinched the wire, look for a broken or corroded connection at the button terminals, and test with a short piece of bell wire as a temporary jumper. If the opener still does not respond, the logic board is the most likely culprit and is generally a technician repair.
The door hums but does not move: opener internals
When you press the wall button and the motor runs but the door does not move, two things are happening at the same time. Either the motor is turning but the connection to the door has failed, or the door has become so far out of balance that the motor cannot pull it. A door that has been working fine and then suddenly becomes impossible for the opener to lift is often a sign that a spring has broken, and the opener is being asked to lift 200 to 400 pounds with no counterbalance.
Things you can check before scheduling a service call:
- Pull the red emergency release cord with the door closed. Try to lift the door by hand. If you cannot lift it more than a few inches, a spring is almost certainly broken.
- Look at the trolley or carriage on the rail above the door. If the chain or belt is slack and the sprocket or pulley is turning without moving the trolley, the internal drive gear has likely stripped.
- Listen for a clicking or whirring sound without any movement. That is the classic sign of a worn drive gear or worm gear inside the opener head.
Drive gear replacement is a common repair and a standard job for technicians. The reason it is not a homeowner fix is that the opener head has to be partially disassembled, the door has to be properly clamped so it cannot move during the repair, and the travel limits have to be reset after the new gear is installed. A botched gear job usually leaves the door either slamming shut or reversing randomly, both of which are safety hazards.
Photo-eye sensors and why the door will not close
Since the early 1990s, federal safety rules in the United States have required every residential garage door opener to include an entrapment protection system. In most openers, that system is a pair of photo-eye sensors mounted a few inches above the floor on each side of the door. If anything breaks the invisible beam while the door is closing, the door has to stop and reverse within a couple of seconds. The same sensors are often involved in a broken garage door that simply refuses to close all the way.
Sensor problems are usually visible if you look for them:
- Each sensor has a small LED. A solid green or amber light on the receiving sensor means it sees the other side. A dim, dark, or blinking light means it does not.
- Spider webs, dust, leaves, and snow on the lenses will all break the beam. Wipe the lenses with a soft, dry cloth.
- If the mounting brackets have been bumped, the sensors may no longer point at each other. Loosen the wing nut, gently aim each sensor at its partner, and retighten.
- Direct sunlight can flood the receiver at certain times of day, especially low sun in winter. A simple sun shield or a short piece of cardboard taped to the receiver side is a legitimate workaround until the angle of the sun changes.
Once the LEDs are solid on both sides, test the door. A properly working system will reverse within about two seconds if you break the beam with a broom while the door is closing. If it does not, the close-force limit and the reverse function need to be rechecked against the opener manual, and that is generally a technician’s job because it involves live testing of a moving door.
Springs: the part that scares even experienced homeowners
Springs are the most dangerous part of a residential garage door. The torsion spring above the opening is wound under several hundred pounds of force, and the extension springs along the horizontal tracks are also under significant load. When a spring breaks, the energy has to go somewhere, and the most common outcomes are a loud bang, a door that suddenly becomes extremely heavy, and a cable that whips against the wall or the door panel.
Common reasons springs fail include:
- Cycle life. Torsion springs are typically rated for 10,000 to 25,000 cycles, where one cycle is one open and one close. A household that uses the door four times a day will reach 10,000 cycles in under seven years.
- Rust and lack of lubrication. A rusty spring wears out faster and is also more likely to snap without warning. Many manufacturers recommend applying a silicone-based garage door lubricant to the springs, hinges, and rollers every six months.
- Poor installation. Springs that are not matched to the door weight, or that are installed without proper winding bars, will fail prematurely and can be dangerous from the first day.
- Salt air and humid climates, which accelerate corrosion on both the spring and the cables.
Replacing a torsion spring requires winding bars, a solid understanding of how to measure the door for the correct wire size and length, and a controlled release of the old spring’s stored energy. The same is true, to a lesser degree, for extension springs. If a service quote for spring replacement seems high, it is partly because the work involves controlled handling of stored energy, not just swapping parts.
Cables, rollers, and tracks: the hardware that takes the abuse
The cables, rollers, and tracks are the parts of a garage door that physically move every time the door opens or closes, so they are also the parts most likely to show wear. A broken garage door that scrapes, jerks, or moves unevenly usually has a problem in one of these three systems rather than in the opener itself.
| Component | What it does | Signs of trouble | Typical fix |
|---|---|---|---|
| Lift cables | Transfer spring force to the bottom of the door and keep the door aligned as it moves | Visible fraying, a cable that has jumped off the drum, one side of the door lifting faster than the other | Replace the cable, inspect drums and bottom fixtures, never reuse an old cable on a new spring |
| Rollers | Roll along the vertical and horizontal tracks on each side | Squealing, grinding, visible flat spots, rollers that do not spin freely | Replace nylon or steel rollers in pairs, lubricate after installation |
| Hinges | Connect the sections so they bend as the door follows the curve of the track | Cracked hinge leaves, loose screws in the door panel, sections that sag relative to each other | Replace the hinge, drive screws into a sturdier part of the panel, replace the panel if the wood is stripped |
| Vertical and horizontal tracks | Guide the door’s path up, across, and back down | Visible bend, gap between track sections, track pulling away from the wall, door binding at a specific height | Straighten a slightly bent track with a rubber mallet, replace badly bent track, re-anchor loose lag screws into solid framing |
| Drums on the torsion shaft | Wind and unwind the cable as the spring moves | Flat spots on the cable groove, cable slipping, the door making a chirping sound at the top of travel | Replace the drums and the cables together, check the shaft bearings |
Two of the most common mistakes homeowners make with this hardware are over-lubricating and over-tightening. A track should never have lubricant on it, because lubricant attracts dust and turns the track into a grinding surface. Bolts on the track brackets should be snug, not torqued down so hard that they distort the bracket. Both mistakes show up as new problems soon after a well-meaning repair.
The opener itself: motor, gears, and limits
An electric opener is a relatively simple device: a motor, a gear reduction, a drive mechanism (chain, belt, or screw), a logic board, and a set of limit switches. The motor itself is usually the last thing to fail. Belts stretch and break, chains wear and skip, drive gears strip, capacitors on the logic board bulge, and limit switches drift out of adjustment. Each of those has its own symptom.
- A belt that is slipping on the pulley will make a faint rubber smell and leave small black dust marks on the rail. Belts stretch over time, especially in cold weather, and eventually the teeth will skip.
- A chain that has become dry will rattle and clank. If the chain has actually jumped a tooth on the sprocket, you will see a jerk in the door’s travel about halfway up.
- Limit switches control how far the door travels up and down. A close limit that is set too high leaves a gap at the bottom. An open limit that is set too low makes the door reverse off the floor at the top, which damages the top seal and the header.
- A capacitor failure on the logic board is one of the most common reasons an older opener goes completely dead. Many board replacements cost less than half of a full new opener, but only if the rest of the unit is in good shape.
When deciding whether to repair or replace an opener, the practical question is the unit’s age. Openers built before 1993 did not have the same entrapment protection standards, and most manufacturers no longer support parts for them. If a 25-year-old unit needs a new logic board, a new gear assembly, and a new chain, the total is often close to the cost of a new, quieter belt-drive unit with a warranty.
Weather, insulation, and the small things that cause big headaches
A surprising number of broken garage door calls are not really about moving parts. They are about how the door interacts with the building and the weather. A slab that has settled, a new layer of concrete in the driveway, or a thicker winter weather seal can all change the gap at the bottom of the door enough to confuse the close limit. A soaked bottom seal from rain or melting snow can weigh down the door and add enough drag to make the opener reverse.
Common environmental issues to check:
- Door hits the ground before the bottom seal fully compresses, or the seal scrapes the concrete all the way across. This usually means the slab is uneven or the close limit is set too low.
- Door leaves daylight across the top corners when closed. This points to worn weatherstripping along the top of the door or a header that has shifted.
- Condensation or ice on the inside of the door in winter. The door is acting as a thermal weak point, and adding insulation or improving ventilation in the garage can reduce the problem.
- Pests and small animals nesting in the bottom seal or behind the track. A chewed seal or a nest on top of the opener is more common than people think, and can keep the door from closing fully.
None of these are dangerous in the way a broken spring is, but they all create a door that misbehaves. Fixing them is usually less expensive than people expect, and it also tends to make the garage more comfortable and the home a little more energy efficient.
When to stop troubleshooting and call a technician
There is a clear dividing line between a homeowner fix and a technician job, and the sooner you recognize it, the safer and cheaper the repair usually is. The list below is a short, conservative rule of thumb. If the symptom is on this list, do not try to fix it yourself.
- You can see a broken spring, a slack cable, or a cable that has jumped off its drum.
- The door is heavy or impossible to lift by hand with the opener disengaged.
- The door is hanging at an angle, even slightly.
- You hear grinding, scraping metal on metal, or a popping sound from inside the opener head.
- The door has come off the track on one or both sides.
- The door is stuck in the open position and you cannot lower it manually with the emergency release.
For all of those situations, the right next step is to keep the door disconnected from the opener, keep people and vehicles clear of the area, and call a licensed garage door service company. A single visit for a spring and cable replacement typically takes under two hours and includes a full safety check of the system, which is often the moment other developing problems are caught.
What a good service visit should include
Once you do schedule a service call, it helps to know what a thorough job looks like. A reasonable service technician will, at minimum:
- Disconnect the opener, balance the door by hand, and confirm that the door holds in place at the halfway point.
- Inspect the cables, drums, hinges, rollers, and tracks for wear, and point out anything that should be replaced soon even if it is not the reason for today’s visit.
- Lubricate the moving parts with a silicone or lithium-based garage door lubricant, not WD-40 or grease.
- Reset the open and close limits on the opener, and test the safety reversal by placing a 2×4 flat on the ground under the door.
- Check the photo-eye alignment and the force settings against the manufacturer’s spec.
- Provide a written quote for any additional recommended work, with the reasoning behind it, before starting the next job.
If a technician’s quote includes parts that are not obviously related to the broken garage door you called about, ask for the reason. Some upsells are legitimate, like replacing both extension springs when one breaks because the other is near the end of its life. Others are not, like replacing the entire opener when only a $30 gear assembly has failed. A second opinion is reasonable for any quote that is in the same range as a new opener.
Preventive care that actually pays off
Most garage door problems are not random. They are the result of small issues that compound over years: a roller that has been dry for too long, a hinge screw that has worked loose, a weather seal that has let water into the bottom section. A short, twice-a-year routine catches most of them.
- Disconnect the opener and lift the door by hand halfway. It should stay put. If it drifts up or falls, the springs need attention before anything else.
- Wipe the photo-eye lenses, retighten their brackets, and confirm both LEDs are solid.
- Lubricate the rollers (not the track), the hinges, the springs, and the lock mechanism with a silicone-based spray. Open and close the door two or three times to work the lubricant in.
- Inspect the weatherstrip along the bottom and sides. Replace any piece that is cracked, missing chunks, or no longer sitting flat against the floor.
- Tighten the track brackets, the hinge screws, and the opener rail mounts. Snug, not forced.
- Test the safety reversal by placing a roll of paper towels or a 2×4 flat under the door. The door should reverse within about two seconds on contact.
This kind of routine typically takes under thirty minutes and is something a careful homeowner can do without any specialty tools. The cost is a can of lubricant and a rag. The benefit is that the small problems get found before they turn into a broken garage door at the worst possible time.
Frequently asked questions
Why did my garage door suddenly stop working?
The most common cause of a sudden failure is a broken spring, a tripped circuit breaker, or a power issue at the opener. Start by checking the breaker and the outlet, then look at the door by hand to see whether the springs are still holding the door’s weight.
Can I manually open a broken garage door?
You can, but only if the door is closed and the spring system is still intact. Pull the red emergency release cord to disengage the trolley, then lift the door by hand. If the door is extremely heavy or will not stay in place, the springs are likely broken and you should not keep trying.
How long do garage door springs usually last?
Most residential torsion springs are rated for 10,000 to 25,000 cycles, where one cycle is one open and one close. A household that uses the door four times a day will reach 10,000 cycles in under seven years. Climate, lubrication, and the door’s weight all affect the actual lifespan.
Is it safe to use a broken garage door until a technician arrives?
If the door is in any way unstable, off its track, or hanging at an angle, keep it disconnected from the opener and stay clear of the area. A door that is still operating normally aside from one minor issue, like a misaligned sensor or a dead remote, is generally safe to use in the short term.
How much does it typically cost to fix a broken garage door?
Costs vary by region and by problem, but a single spring replacement with cable inspection is commonly a few hundred dollars for parts and labor, a sensor realignment is much less, and a full opener replacement is more. The safest approach is to ask for a written quote that breaks down parts and labor separately.
Do I need a permit to replace a garage door?
Many municipalities do not require a permit for a like-for-like replacement, but some do require one for structural changes, electrical changes, or new openers. Check with your local building department before scheduling the work, especially if the project includes changes to the header, the framing, or the electrical circuit.
What is the difference between a torsion spring and an extension spring?
A torsion spring is mounted on a shaft directly above the door opening and twists to store energy. Extension springs run along the horizontal tracks on each side and stretch to store energy. Torsion systems are generally smoother, safer to service for a trained technician, and more common on newer doors.
Why does my garage door open but not close all the way?
The two most common reasons are misaligned or obstructed photo-eye sensors and a close limit switch that is set too high. Clean the sensor lenses, realign the brackets, and adjust the close limit on the opener according to the manual. If the problem persists, the tracks, the bottom seal, or the close-force setting may need attention.
How can I tell which spring is broken on my garage door?
For a torsion spring, a break usually shows as a visible gap in the spring coil above the door, often with a loud bang at the moment it broke. For extension springs, the broken one will be visibly stretched out or hanging loose along the track, and the door will be much harder to lift on the side where the spring failed.
Should I repair or replace my garage door opener?
If the opener is more than 15 to 20 years old, the cost of a major repair is often close to the cost of a new belt-drive unit with a warranty and quieter operation. If the opener is younger, a repair such as a gear assembly, a belt, or a logic board is usually the better value. Either way, replace the batteries in the remotes at the same time.
Leave a Reply