
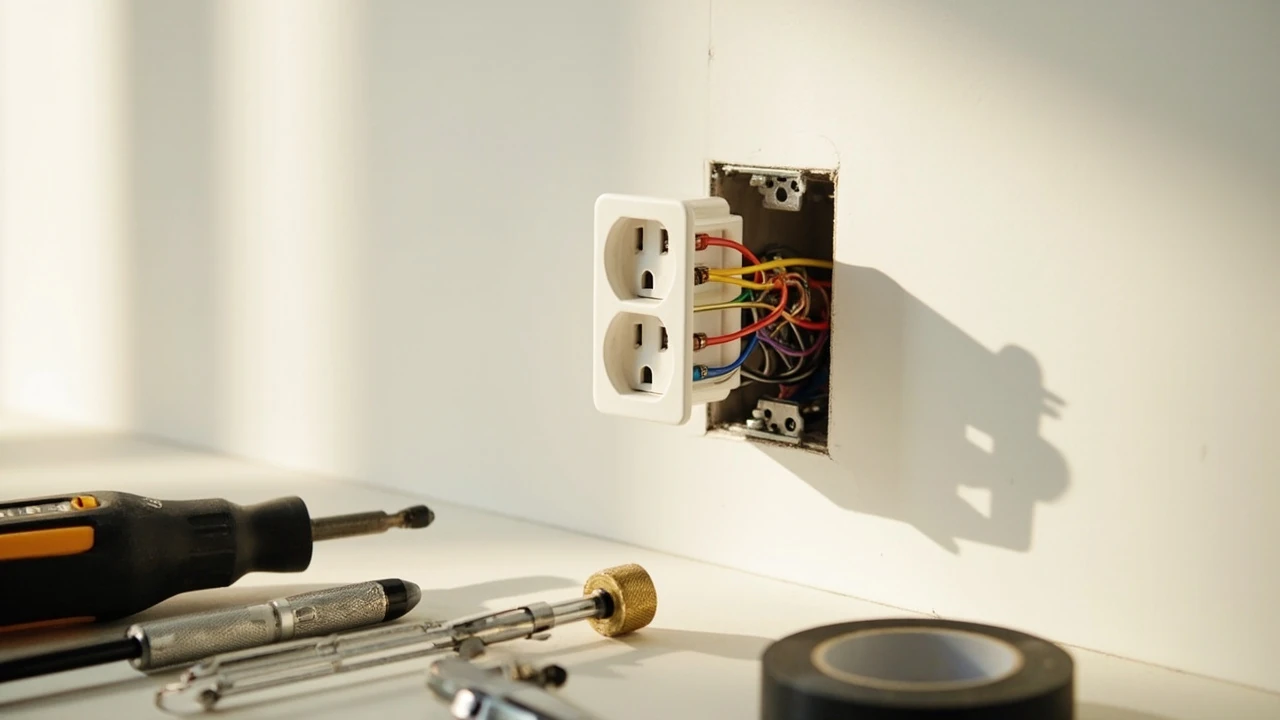
Electrical outlet repair: a practical homeowner’s guide
A lamp that will not turn on, a phone charger that suddenly stops working, or a hair dryer that keeps tripping the bathroom outlet are some of the most common reasons homeowners start thinking about electrical outlet repair. In most cases the underlying problem is simple, and a homeowner with a basic toolkit and a careful approach can resolve it in under an hour. In other cases, what looks like a bad outlet is really a symptom of a deeper wiring problem that needs a licensed electrician.
The goal of this guide is to help you tell the difference. It walks through how a standard US outlet works, the tools and safety steps you need before touching anything, the specific fixes for the most common problems, and the warning signs that mean you should stop and call a pro. If you are weighing a do-it-yourself repair against a service call, the practical checks below will help you make that decision with eyes open.
How a standard electrical outlet actually works
Before you start any electrical outlet repair, it helps to know what is going on behind the cover plate. A typical duplex receptacle in a US home is the visible end of a small branch circuit that begins at the breaker panel, runs through the walls, and ends at the last outlet or switch on the run.
Inside the outlet, three conductors do the real work. The hot wire, usually black or red, carries 120 V alternating current from the panel to the outlet. The neutral wire, usually white, returns current to the panel and completes the circuit. The ground wire, bare or green, is a safety path that gives stray current a route to trip the breaker if something goes wrong inside an appliance or the outlet itself.
When you plug in a device, the prongs on its cord touch spring-loaded contact strips inside the outlet, and current flows through the device and back. The plug is held in place by the friction of those contact strips, which is exactly why a plug that slowly walks out of the wall, or one that feels loose, is a sign the contact strips have weakened. That single failure mode is one of the most common reasons people end up planning an electrical outlet repair in the first place.
Safety comes first, every time
Most household electrical work is low voltage by industrial standards, but a 120 V household circuit is more than enough to cause a serious injury, a house fire, or both. Treating every outlet as if it were live until you have proven otherwise is the single most important habit for safe electrical outlet repair.
- Tell everyone in the house which breaker you are turning off, and tape a note over the panel so no one flips it back on while you are working.
- Verify the right breaker by plugging a working lamp or radio into the outlet and watching it go dead when you flip the breaker. Do not rely on the panel label alone, because labels are often wrong or out of date.
- Test the outlet with a non-contact voltage tester or a plug-in outlet tester before you remove the cover plate, and again after the plate is off, before you touch any wire.
- Wear insulated gloves and stand on a dry surface. Never work on an outlet while standing in water, on a wet floor, or with wet hands.
- Keep one hand in your pocket when probing inside the box, so a shock cannot travel across your chest.
If at any point during an electrical outlet repair the wires inside the box look burnt, melted, or blackened, stop. That is a sign of overheating, and the surrounding wiring should be inspected before any new device is installed.
Tools and parts you actually need
You can complete most household electrical outlet repair jobs with a small, inexpensive kit. There is no need to buy a pro-grade set; the tools below cover roughly nine out of ten jobs you will encounter in a typical home.
| Tool or part | What it is for | When you can skip it |
|---|---|---|
| Non-contact voltage tester | Confirms the outlet is dead before you touch wires | Never skip this on a live repair |
| Plug-in outlet tester | Reads wiring errors like open ground or reversed polarity | Optional for simple replacements |
| Insulated screwdriver set (flathead and Phillips) | Removes cover plate and terminal screws | Never skip |
| Needle-nose pliers | Bends and shapes wire loops around terminal screws | Only if you have wire leads to redo |
| Wire stripper | Strips insulation cleanly without nicking copper | Only when replacing damaged wire ends |
| Replacement duplex receptacle | Swap for a worn or damaged outlet | Match amp rating, usually 15 A or 20 A |
| Replacement cover plate | Covers the device and protects the box | Reuse if undamaged |
| Electrical tape | Reinsulates a nicked wire or a backstab hole | Optional |
A quick note on replacement outlets. Standard residential receptacles are either 15 amp or 20 amp, and the difference shows up on the face of the outlet. A 20 A outlet has one slot that looks like a sideways T to accept a 20 A plug, while both slots on a 15 A outlet are vertical. Kitchens, garages, and other higher-load rooms often run 20 A circuits, and the replacement should match the existing rating, not the device you plan to plug in.
Diagnosing the problem before you repair
Half of a successful electrical outlet repair is correctly identifying the failure. Some symptoms look like outlet problems but are really panel or wiring problems, and replacing the outlet will not fix them. Run through this short checklist before you pull the cover plate.
- Is the outlet truly dead, or is the breaker tripped? Check the panel first. A tripped breaker often sits between ON and OFF, and you have to push it fully to OFF before flipping it back to ON.
- Is the dead outlet downstream of a GFCI receptacle? Bathrooms, kitchens, garages, basements, and outdoor circuits are usually protected by a GFCI, and a tripped GFCI will cut power to every outlet on its load side. Press RESET on the nearest GFCI and the chain often comes back to life.
- Is only one receptacle on the duplex dead while the other still works? That points to a bad contact strip on the dead half, and replacing the whole outlet is usually easier and more reliable than trying to rebuild one half.
- Do you hear a buzz, smell something warm, or see discoloration around the face? That suggests overheating, not a simple wear failure, and the right move is to turn the breaker off and plan for a closer look or a service call.
Step-by-step: a standard outlet replacement
This is the workhorse of household electrical outlet repair. The same basic motion covers a worn outlet, a cracked face, a loose plug fit, and most cosmetic replacements. Allow about 20 to 40 minutes for a first-timer.
- Turn off the breaker that feeds the outlet, and verify the outlet is dead with a non-contact voltage tester and a plug-in outlet tester.
- Unscrew and remove the cover plate. Set the screws in a small cup so they do not disappear into the wall.
- Unscrew the two mounting screws that hold the outlet to the electrical box, and gently pull the outlet forward. Do not yank; the wires behind it have a fixed length.
- Note where each wire connects. The black hot wire goes to a brass-colored screw, the white neutral goes to a silver screw, and the bare or green ground goes to the green screw. Snap a phone photo if the wiring is unfamiliar.
- Loosen each terminal screw and unhook the wires. If the wires were pushed into backstab holes rather than wrapped around screws, insert a small flathead screwdriver into the release slot and gently pry the wire free.
- Inspect the wire ends. Copper that is dark, nicked, or frayed should be trimmed back and re-stripped so you have clean, bright copper for the new outlet.
- Form each wire into a clockwise hook with needle-nose pliers, hook it under the correct terminal screw, and tighten the screw firmly. Wrapping clockwise keeps the loop from squeezing out as the screw tightens.
- Tuck the wires neatly back into the box, press the outlet flush, and tighten the mounting screws. The outlet should sit straight and not bow away from the wall.
- Reinstall the cover plate, restore power at the breaker, and test the outlet with a plug-in outlet tester.
The general safety walk-through for this kind of work, including turning off the breaker, verifying dead with a voltage tester, and rechecking after reassembly, is described in more detail in this step-by-step guide for safely handling common outlet issues.
Fixing specific outlet problems
Once the outlet is out of the wall, the actual repair is usually one of a handful of choices. The table below maps the symptom you see to the most likely cause and the most common fix.
| Symptom | Most likely cause | Typical fix | DIY or call a pro |
|---|---|---|---|
| Outlet completely dead, breaker fine | Tripped upstream GFCI or backstab failure | Reset nearest GFCI, then rewire to side screws | DIY |
| One half of duplex dead, other half works | Worn contact strip on the dead half | Replace the entire outlet | DIY |
| Plug falls out or feels loose | Contact strips have lost tension | Replace the outlet | DIY |
| Outlet warm to the touch, mild discoloration | Loose connection at terminal screw | Reterminate on side screws, replace outlet if pitted | DIY if minor, pro if any melting |
| Sparks when plugging in, buzzing sound | Arcing at loose terminal or damaged device | Replace outlet, inspect wire insulation | DIY for device, pro for persistent arcing |
| Reset button on GFCI will not stay in | Ground fault downstream or failing GFCI | Unplug loads on the circuit, retest, then replace GFCI | DIY, pro if it keeps tripping |
| Outlet works briefly, then dies | Loose backstab connection overheating | Move wires from backstab holes to side screws | DIY |
| Multiple outlets and lights dead at once | Tripped main or circuit issue beyond the outlet | Reset main, then call an electrician if it repeats | Pro |
When a GFCI is part of the picture
Ground Fault Circuit Interrupter receptacles look like a normal outlet with two extra buttons in the center, usually labeled TEST and RESET. They are required in locations where water and electricity are likely to meet, such as bathrooms, kitchens, laundry areas, garages, basements, and outdoor outlets. A GFCI monitors the current going out on the hot conductor and coming back on the neutral, and trips if it detects an imbalance as small as 4 to 6 milliamps.
For electrical outlet repair, the most useful habit is to treat any dead outlet in a wet area as a GFCI problem first. Press RESET firmly, then press TEST and then RESET again to see whether the GFCI will hold. If the RESET will not stay in, unplug everything downstream of that GFCI and try again. If it still will not hold, the GFCI itself is probably failing, and a same-amperage replacement is a routine swap using the same steps as a standard outlet. If the new GFCI will not hold either, the fault is in the wiring beyond it, and that is the point at which calling a licensed electrician is the safer call.
Common mistakes to avoid
Most failed electrical outlet repair projects fail for the same handful of reasons, and almost all of them are easy to prevent with a slow first pass.
- Using backstab connections instead of wrapping wires around the side screws. Backstabbing is faster, but the spring contact inside the hole loosens over time and is the leading cause of mysteriously dead or warm outlets.
- Overstuffing the electrical box. A standard single-gang box is small. If you force too many wires behind a new outlet, the outlet sits at an angle and the cover plate will not sit flat, which is both ugly and a strain on the terminals.
- Reusing a damaged cover plate. Cracked or chipped plates expose live terminals to fingers and to dust. They are cheap, and replacing them is part of finishing the job properly.
- Mixing wire gauges on a single terminal. If the existing outlet has two wires on one screw, that is a sign the outlet is mid-run, and you need to keep both wires on the same terminal rather than dropping one.
- Skipping the final test. After restoring power, use a plug-in outlet tester to confirm correct wiring, not just that there is voltage. A reversed hot and neutral can still power a lamp while creating a real shock risk.
When to stop and call a licensed electrician
There is no shame in stopping an electrical outlet repair in the middle. Some problems are simply outside the scope of a homeowner repair, and a good rule of thumb is that the more wires, the more risk.
- You see burn marks, melted insulation, or a persistent burning smell anywhere on the outlet or the surrounding wall.
- The breaker trips again as soon as you reset it, even with nothing plugged into the affected outlets.
- Multiple rooms or multiple outlets lose power at the same time, especially if lights are also affected.
- The outlet is in a panel or subpanel area, or the wiring looks like aluminum rather than copper, which requires special connectors and treatment.
- You open the box and find water, rust, or signs of pest activity inside it.
In any of these cases, leave the breaker off and call a licensed electrician. A trained pro has the diagnostic tools to find the actual fault, the materials to make a code-compliant repair, and the experience to spot related problems that are not yet visible.
Routine maintenance that prevents repairs
Most electrical outlet repair work is the downstream result of small issues that were easy to fix but easy to ignore. A short, twice-a-year walk-through of the house is enough to catch most of them before they become a real problem.
- Walk room to room with a plug-in outlet tester and check every receptacle, including those behind furniture. Note any that show an open ground or reversed polarity.
- Press the TEST button on every GFCI receptacle, then press RESET. The power should briefly cut off and come back, confirming the device still works.
- Look for warm face plates, discoloration, or a faint smell of plastic, especially around outlets that see heavy use, like kitchen counter receptacles.
- Replace any outlet where a plug no longer holds firmly. Once the contact strips are loose, they will not tighten up again on their own.
- Avoid daisy-chaining power strips or running high-wattage appliances like space heaters through extension cords, both of which overload a single outlet and shorten its life.
Cost, time, and expectations
For a single standard electrical outlet repair that you do yourself, the realistic time is about 20 to 45 minutes for a first attempt, and the realistic cost is roughly five to fifteen dollars for the replacement outlet, a new cover plate, and a basic plug-in tester if you do not already own one. The biggest line item is usually your time.
For the same repair done by a licensed electrician, the typical service call is in the range of a modest minimum charge plus a small per-outlet fee, with extra cost if the wiring itself needs to be replaced. A first call that covers a single outlet will often be a minimum-fee visit, and bundling several outlets into one visit is the most efficient way to use a service call. If you have any doubt about whether the underlying wiring is sound, a single service call that diagnoses a whole circuit is usually a better investment than a string of outlet-by-outlet attempts.
A short pre-repair checklist
Before you start any electrical outlet repair, run through this short list. It takes about two minutes and it is the difference between a clean, safe fix and a frustrating afternoon.
- Identify the right breaker and turn it off.
- Notify anyone in the house and tape a note on the panel.
- Verify the outlet is dead with both a non-contact voltage tester and a plug-in tester.
- Confirm you have the correct replacement outlet, a matching cover plate, and a clean set of hand tools.
- Plan to spend the next 30 to 60 minutes working carefully, without rushing, on this single outlet.
After the work, restore power, test the outlet, and walk through the room to confirm nothing else on the same circuit has changed. If anything looks or smells wrong, turn the breaker back off and reassess. A careful first attempt is a good learning experience. A careful second attempt on the same outlet is a sign the problem is bigger than the device itself.
Frequently asked questions
Is it safe to do electrical outlet repair without an electrician?
For a single, accessible outlet where the problem is clearly a worn or loose device, a careful homeowner can do the work safely with the breaker off and a verified dead outlet. The risk grows when the wiring behind the outlet is the actual problem, or when there are signs of heat, burning, or repeated tripping, and those situations are better handled by a licensed electrician.
How do I know the outlet I am about to work on is really off?
Turn the breaker off, then test the outlet with both a non-contact voltage tester and a plug-in outlet tester. If either tool shows voltage, the breaker you switched is not the one feeding the outlet, and you need to find the correct breaker before continuing.
What is the difference between a 15 amp and a 20 amp outlet?
The face of a 20 amp receptacle has one T-shaped slot to accept a 20 amp plug, while both slots on a 15 amp receptacle are vertical. Kitchens, garages, and similar higher-load rooms are usually wired with 20 amp circuits, and the replacement outlet should match the existing rating, not the appliance you plan to plug in.
Why does one half of my duplex outlet work and the other half not?
Each half of a duplex outlet has its own set of internal contact strips, and one half can wear out while the other is still good. Replacing the entire outlet is faster and more reliable than trying to rebuild one half, and the device itself is inexpensive.
What does it mean if the outlet is warm or smells like plastic?
A warm outlet or a faint plastic smell usually means a loose connection at a terminal screw or a worn contact strip. The safe move is to turn the breaker off, open the outlet, and either reterminate the wires on the side screws or replace the outlet. If you see discoloration or melting, the wiring itself should be inspected by a professional before the outlet is put back into service.
How often should I test my GFCI outlets?
Press the TEST and RESET buttons on every GFCI outlet in the home about every three to six months. If a GFCI will not hold RESET after you have unplugged everything on its circuit, the GFCI itself is likely failing and should be replaced.
Can I replace an outlet with a GFCI myself?
Yes, a standard duplex receptacle can be replaced with a GFCI receptacle on most circuits, and the wiring steps are the same as a regular outlet replacement. The added step is to make sure the LINE and LOAD terminals are wired correctly, because reversing them will leave downstream outlets unprotected. The GFCI packaging and the device itself include a clear diagram.
How long should a residential outlet last before it needs repair?
A typical outlet in normal use lasts many years, but the contact strips inside can wear out sooner in outlets that see frequent plugging and unplugging, like a kitchen counter or a home office. A plug that no longer holds firmly, or a face that is warm to the touch, is a practical signal that the device is approaching the end of its service life.
What are common causes of a dead outlet that are not the outlet itself?
The three most common causes of a dead outlet that have nothing to do with the outlet are a tripped breaker, a tripped GFCI upstream on the same circuit, and a backstab connection that has loosened inside the outlet. Of those, a tripped GFCI is the one homeowners most often overlook.
When should I stop and call a professional instead of finishing the repair?
Stop and call a licensed electrician if the breaker will not reset, if the outlet shows signs of burning or melting, if multiple outlets or lights are affected at once, or if the wires inside the box look damaged in any way. Those symptoms usually point to a problem in the wiring rather than the device, and they need a trained eye and often specialized tools to diagnose and fix.
Leave a Reply